Did you know that over 60% of medical emergencies involving pets occur right at home? When a crisis strikes, those initial minutes are often the most critical factor in determining a positive outcome. Learning first aid for dogs is not just about enhancing your pet’s quality of life; it is about potentially saving it.
Many people feel helpless when their furry companion faces a sudden injury or illness. However, you can transform that anxiety into calm, decisive action with the right preparation. By mastering basic stabilization techniques, you provide a vital bridge until professional medical care becomes available.
This guide empowers you to handle stressful situations with confidence. Understanding how to react effectively ensures you remain a steady advocate for your pet during their most vulnerable moments. Embracing first aid for dogs is a profound way to show your commitment to their long-term health and safety.
Key Takeaways
- Preparation significantly improves survival rates during home emergencies.
- Remaining calm helps you assess the situation more clearly.
- Basic stabilization techniques act as a bridge to professional care.
- Confidence in your skills reduces panic during high-stress events.
- Regular practice of these methods keeps your knowledge sharp.
The Importance of Emergency Preparedness for Pets
When a medical crisis strikes your pet, your ability to react quickly can make all the difference. Whether you are dealing with minor wounds, burns, or more serious issues like choking and poisoning, having a plan is essential. Proper dog first aid knowledge transforms a moment of panic into a controlled, effective response.
True emergency preparedness for pets goes far beyond simply stocking a medical kit. It requires you to understand your dog’s normal health baseline so you can spot when something is wrong. By keeping a detailed record of your pet’s medical history, current vaccinations, and daily medications, you provide your veterinarian with vital information during a high-stress situation.
Proactive planning is the most effective way to protect your dog’s long-term well-being. When you have a clear strategy in place, you reduce the likelihood of making mistakes caused by fear or confusion. This preparation ensures that you can provide the best possible care while waiting for professional help.
The following table highlights why being ready is a critical component of responsible pet ownership:
| Feature | Unprepared Owner | Prepared Owner |
|---|---|---|
| Response Time | Delayed by panic | Fast and focused |
| Medical Data | Unknown or missing | Readily available |
| Decision Making | Erratic and unsure | Calm and informed |
| Outcome | Higher risk of complications | Better chance of recovery |
Ultimately, your commitment to dog first aid training and organization serves as a safety net for your companion. By staying informed and ready, you ensure that you are always prepared to act when your dog needs you the most. Consistent emergency preparedness for pets is the greatest gift you can give your furry friend.
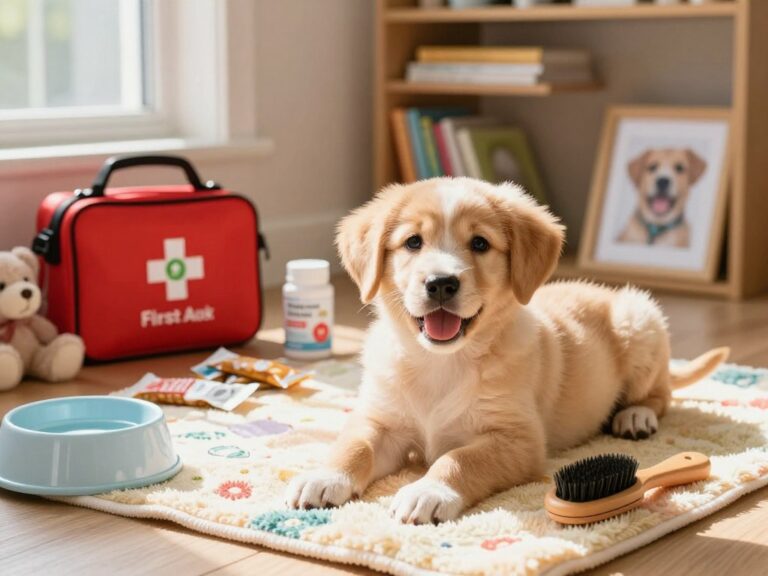
Essential Items for Your Dog First Aid Kit
Having the right tools on hand can make a world of difference during a stressful medical event. A well-stocked dog first aid kit is the cornerstone of effective emergency response for any pet owner. By keeping these supplies organized, you ensure that you can act quickly when every second counts.

Must-Have Medical Supplies
To build a reliable kit, you need to focus on dog first aid kit essentials that address common injuries. These items allow you to stabilize your pet before you reach a professional facility.
- Gauze pads and adhesive tape: Essential for covering wounds and controlling bleeding.
- Antiseptic wipes: Used to clean minor scrapes and prevent infection.
- Digital thermometer: Vital for checking if your dog has a fever or signs of heatstroke.
- Tweezers: Necessary for removing ticks, thorns, or small glass shards from paws.
Tools for Restraint and Transport
Even the most gentle dog may bite when they are in severe pain or shock. Protecting yourself is just as important as helping your pet, which is why restraint tools are non-negotiable.
Always include a sturdy leash and a properly fitted muzzle in your kit. A thick blanket is also useful, as it can serve as an improvised stretcher to move an injured dog without causing further harm to their limbs or spine.
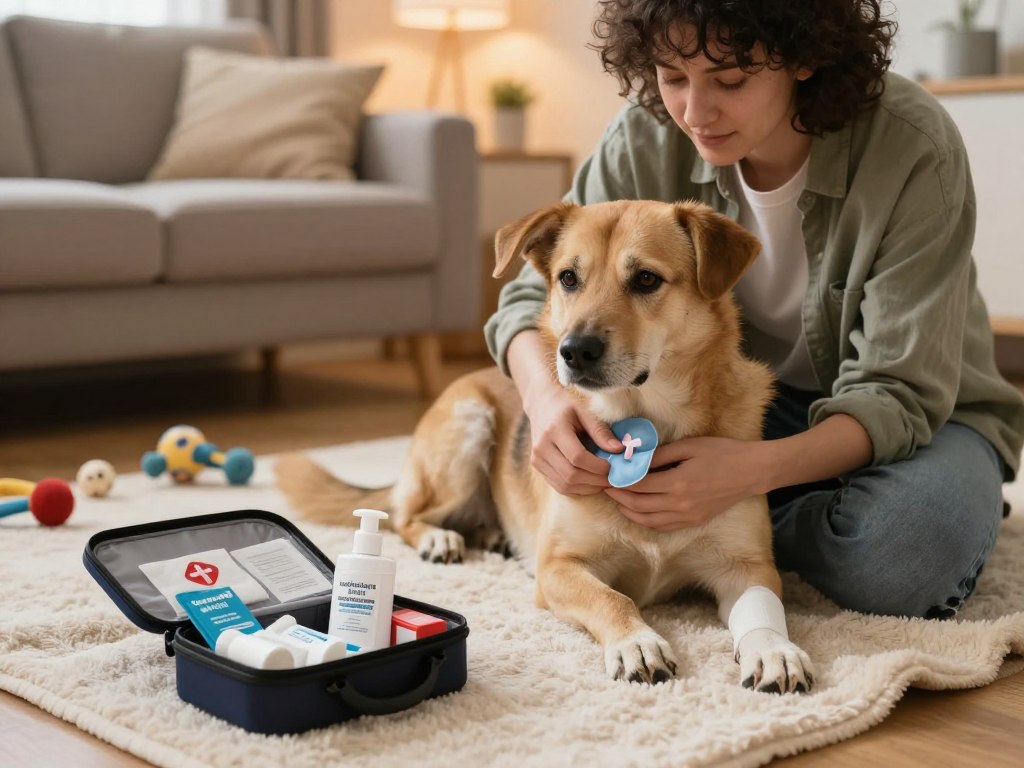
Documentation and Emergency Contacts
In the heat of the moment, it is easy to forget important details. Keep a waterproof folder inside your kit that contains your veterinarian’s phone number and the address of the nearest 24-hour animal hospital.
It is also wise to include a copy of your dog’s vaccination records and a list of any current medications. Having this information ready ensures that you receive the best possible dog emergency care without unnecessary delays.
Assessing the Situation and Staying Calm
When your dog faces a medical emergency, your ability to remain composed is the most powerful tool you have. Your pet can sense your anxiety, and if you panic, their stress levels will rise, potentially worsening their physical condition. Staying calm allows you to think clearly and act effectively during a crisis.
By maintaining a steady presence, you create a safer environment for both yourself and your companion. Following proper pet first aid steps ensures that you address the most urgent needs without causing further trauma to your dog.
Approaching an Injured Animal Safely
Even the gentlest dog may bite when they are in severe pain or shock. Always approach your pet slowly and speak in a soft, reassuring voice to let them know you are there to help. Observe their body language for signs of aggression, such as growling, baring teeth, or stiff posture.
If the dog seems agitated, consider using a makeshift muzzle before you attempt to touch them. This simple precaution protects you from accidental bites while you provide necessary care. Always move with deliberate, slow motions to avoid startling an already frightened animal.
Checking Vital Signs
Once you have safely reached your dog, you should perform a quick assessment of their physical state. These canine first aid tips focus on identifying critical issues like breathing difficulties or irregular heartbeats. Check their gum color, which should be a healthy pink, and feel for a steady pulse.
Monitoring these signs helps you provide accurate information to your veterinarian later. If you notice pale gums, shallow breathing, or an inability to stand, these are clear indicators that your dog requires immediate professional attention. Keep your assessment brief so you can move quickly toward stabilizing your pet for transport.
First Aid for Dogs: What Every Dog Owner Must Know Before Reaching the Vet
Providing effective first aid for dogs requires a clear head and a solid grasp of emergency timelines. When a crisis strikes, your ability to recognize the urgency of the situation is your pet’s best defense. Knowing when to stabilize your dog at home and when to rush to the clinic is a critical skill for every owner.

Understanding the Golden Hour
In veterinary medicine, the Golden Hour refers to the critical sixty-minute window following a traumatic injury. During this time, immediate professional intervention significantly improves the chances of a positive outcome. This concept is especially vital for issues involving severe bleeding, shock, or acute breathing difficulties.
While you may feel the urge to perform extensive procedures, your primary goal is to stabilize the animal for transport. Time is of the essence, and delaying professional care to perform complex tasks can be dangerous. Focus on keeping your dog calm and comfortable while you move toward the nearest veterinary facility.
When to Call the Emergency Vet
Recognizing the signs that require professional dog emergency care is essential for your pet’s safety. You should never hesitate to contact your veterinarian if you notice sudden changes in behavior or physical health. Calling ahead allows the clinic staff to prepare for your arrival, ensuring that life-saving equipment is ready the moment you walk through the door.
The following table helps distinguish between situations that require immediate attention and those that can wait for a standard appointment.
| Symptom | Urgency Level | Recommended Action |
|---|---|---|
| Difficulty breathing | Critical | Go to emergency vet immediately |
| Uncontrolled bleeding | Critical | Apply pressure and transport |
| Mild lethargy | Moderate | Monitor and call for advice |
| Seizure activity | Critical | Clear area and seek urgent care |
Always trust your instincts when it comes to your pet’s health. If you feel that something is wrong, it is better to be safe and seek professional guidance. Providing high-quality dog emergency care starts with your quick and informed decision to reach out for help.
Handling Bleeding and Open Wounds
When your furry friend suffers a cut, knowing how to manage bleeding is a vital skill. Mastering these diy dog first aid techniques can help you stabilize your pet before you reach the veterinary clinic. Staying calm is the first step to ensuring your dog remains relaxed during the process.
Applying Direct Pressure
If you notice active bleeding, your primary goal is to stop the flow as quickly as possible. Take a clean piece of gauze or a sterile cloth and place it firmly over the wound. Apply steady, constant pressure for at least five to ten minutes without lifting the cloth to check the injury.
Lifting the cloth too early can disrupt the clotting process that has just begun. If the blood soaks through the first layer, do not remove it. Simply place another clean pad directly on top and continue to hold firm pressure.
Using Bandages and Gauze
Once the bleeding has slowed or stopped, you may need to secure the area to prevent further contamination. Use a roll of gauze to wrap the wound, ensuring it is snug but not tight enough to cut off circulation. Proper wrapping protects the site from dirt and debris while you travel to the vet.
Check the skin below the bandage periodically to ensure it is not swollen or cold. If you notice signs of restricted blood flow, loosen the bandage immediately. Keeping the area clean is essential for preventing secondary infections.
Managing Minor Cuts vs. Deep Lacerations
Understanding the severity of the injury is a critical part of common dog injuries handling. For minor surface scrapes, you can gently clean the area with warm water and a mild antiseptic solution. Pat the area dry carefully before applying a light, protective bandage.
However, deep lacerations that expose muscle or bone require immediate professional attention. Do not attempt to clean deep wounds with harsh chemicals, as this may cause further tissue damage. Your main priority with severe injuries is to control the bleeding and transport your dog to an emergency facility as safely as possible.
Managing Fractures and Sprains
Seeing your dog struggle with a sudden injury is frightening, but knowing how to manage bone trauma can make a world of difference. Utilizing proper diy dog first aid techniques helps keep your pet stable until you reach professional veterinary care. Always remember that your primary goal is to minimize pain and prevent the injury from becoming more severe.

Identifying Signs of Bone Injury
Bone injuries are often extremely painful and require a very gentle touch. You might notice your dog suddenly holding a limb up or refusing to put any weight on it at all. Watch for these common indicators:
- Obvious swelling or bruising around the affected area.
- An unnatural angle or deformity in the limb.
- Excessive vocalization, such as whining or yelping, when the area is touched.
- Visible bone fragments if the skin has been broken.
Stabilizing the Limb
If you suspect a fracture, your main priority is to immobilize the limb to stop it from moving. You can apply diy dog first aid techniques by using soft padding, such as a folded towel or a thick blanket, to support the leg. Avoid trying to “set” the bone yourself, as this can cause significant internal damage.
Keep the dog as still as possible while you prepare for transport. If the dog is in shock, keep them warm with a blanket while you wait for help or prepare to leave for the clinic.
Preventing Further Damage During Movement
Moving an injured dog requires extreme caution to avoid worsening the trauma. If you suspect a broken bone or potential spinal injury, you must keep the dog’s body aligned.
Gently slide your pet onto a firm surface, such as a sturdy board or a flat piece of plywood, to act as an improvised stretcher. If a board is not available, a thick, folded towel can work well to provide the necessary support. Always move slowly and ensure the injured limb is not bearing any weight during the transition to your vehicle.
Responding to Choking and Airway Obstructions
Witnessing your dog struggle to breathe is a terrifying experience that demands immediate, calm action. When a foreign object blocks your pet’s airway, your quick response is the difference between a minor scare and a life-threatening emergency. Mastering these diy dog first aid techniques will help you stay focused and effective during a crisis.
Clearing the Mouth Safely
If you suspect your dog is choking, first check the mouth for any visible obstructions. Carefully open the jaws and use a flashlight to inspect the throat area. If you see an object, use your fingers or a pair of blunt-nosed tweezers to gently remove it.
Be extremely cautious not to push the object further down the throat. If the object is lodged deep or you cannot grasp it easily, do not force the issue. Instead, move quickly to physical maneuvers to dislodge the blockage.
“The most important step in any pet emergency is to remain calm; your dog can sense your panic, which may cause them to struggle more and further restrict their breathing.”
Performing the Heimlich Maneuver on Dogs
When the object remains stuck, you must perform the Heimlich maneuver to clear the airway. This is one of the most critical diy dog first aid techniques every owner should practice before an emergency occurs.
- For small dogs: Place your dog on their back and apply firm, quick pressure to the abdomen just below the rib cage.
- For large dogs: Stand behind your dog, wrap your arms around their waist, and make a fist with one hand. Place your fist just below the rib cage and pull upward and forward in a sharp, thrusting motion.
Repeat these thrusts up to five times if necessary. Always check the mouth again after each set of thrusts to see if the object has been dislodged. If your dog becomes unconscious, be prepared to begin rescue breathing or CPR immediately.
Recognizing and Treating Heatstroke
When the temperature rises, your dog’s internal cooling system can quickly become overwhelmed. Heatstroke is a serious medical emergency that requires swift, calm, and effective action. Proper knowledge of common dog injuries handling can make the difference between a full recovery and a tragic outcome.

Identifying Early Warning Signs
You must act quickly if you notice your dog struggling in the heat. Early indicators often include excessive panting and thick, sticky drooling. You may also observe that your dog’s gums have turned a bright red or even a purple hue.
Watch for signs of disorientation or weakness as the condition progresses. If your dog seems confused, stumbles, or refuses to move, they may be entering a state of heatstroke. Recognizing these symptoms early is a critical part of common dog injuries handling.
Cooling Techniques That Are Safe
The goal is to lower your dog’s body temperature gradually. Never use ice or ice-cold water, as this can cause blood vessels to constrict and trap heat inside the body. Instead, use tepid or cool water to wet your dog’s fur, especially around the paws, ears, and belly.
Place your dog in a shaded area with good airflow, such as in front of a fan. Gentle evaporation is your best tool for safe cooling. Always keep the water temperature moderate to avoid shocking the dog’s system.
When to Stop Cooling
It is vital to monitor your dog’s temperature constantly during the cooling process. Use a rectal thermometer if available to track their progress. You should stop active cooling once the dog’s temperature reaches 103°F (39.4°C).
Continuing to cool the dog past this point can lead to hypothermia, which is another dangerous condition. Once the temperature stabilizes, transport your pet to the veterinarian immediately for professional care. Proper common dog injuries handling ensures your pet remains safe until they reach the clinic.
Addressing Poisoning and Ingestion of Toxins
Discovering that your dog has ingested something toxic is a terrifying experience for any pet owner. Knowing the right canine first aid tips can make a significant difference in your dog’s recovery. When you suspect poisoning, your primary goal is to remain calm and act with precision.
Common Household Hazards
Many items in your home are dangerous to dogs, even if they seem harmless to humans. Common culprits include chocolate, grapes, raisins, onions, and xylitol, which is often found in sugar-free gum. Household cleaners, antifreeze, and certain indoor plants like lilies or sago palms also pose severe risks.
It is important to keep these substances stored securely out of reach. If you notice your dog acting lethargic, vomiting, or drooling excessively, investigate the area for signs of chewed packaging or spilled liquids. These canine first aid tips are designed to help you identify potential threats before they escalate.
What to Do Before Inducing Vomiting
You might feel the urge to make your dog vomit immediately, but never do this without professional guidance. Some substances, such as caustic chemicals or petroleum products, can cause severe chemical burns or aspiration pneumonia if they come back up. Always call your veterinarian or a pet poison control center first.
They will provide specific instructions based on the substance and the time elapsed since ingestion. Following their advice is the safest way to manage the situation. If they instruct you to induce vomiting, they will tell you exactly how to do it safely.
Gathering Evidence for the Veterinarian
When you head to the clinic, bring the packaging or a sample of the suspected toxin with you. This evidence helps the vet identify the exact chemical composition and determine the best antidote. If you cannot bring the item, take a clear photo of the label, including the list of ingredients.
Note the time you believe the ingestion occurred and any symptoms you have observed so far. Providing this information quickly allows the medical team to start life-saving treatment immediately. Utilizing these canine first aid tips ensures you are prepared for the unexpected.
| Toxin Type | Common Examples | Primary Risk |
|---|---|---|
| Human Foods | Chocolate, Grapes, Xylitol | Organ failure or seizures |
| Chemicals | Antifreeze, Bleach | Kidney damage or burns |
| Medications | Ibuprofen, Tylenol | Internal bleeding or toxicity |
| Plants | Lilies, Sago Palm | Severe gastrointestinal distress |
Dealing with Burns and Chemical Exposure
Accidents involving heat or chemicals can happen in the blink of an eye in any home. When your pet encounters a hot surface or a harsh substance, your immediate reaction is vital to minimize tissue damage. Following these canine first aid tips will help you provide the best care while waiting for professional veterinary help.

Treating Thermal Burns
If your dog suffers a thermal burn, the first step is to remove them from the heat source immediately. Once the dog is safe, apply cool, running water to the affected area for at least five minutes. Never use ice or ice water, as this can cause further damage to the skin by restricting blood flow.
After cooling the area, gently pat it dry with a clean cloth. Cover the burn loosely with a sterile, non-stick bandage to prevent contamination. Keep your dog calm and transport them to the vet as soon as possible for a professional assessment.
Handling Chemical Spills on Fur or Skin
Chemical burns require a different approach, as the substance must be removed to stop the reaction. If the chemical is a dry powder, brush it off carefully before applying any liquid. If it is a liquid, flush the area with large amounts of lukewarm water for at least 15 to 20 minutes.
Be careful not to spread the chemical to unaffected parts of the dog’s body. If the substance is in the eyes, flush them gently with saline or water, ensuring the runoff does not enter the other eye. Always consult your veterinarian or a poison control center to identify if specific neutralizing agents are needed.
Protecting Yourself During Cleanup
Your safety is just as important as your dog’s during an emergency. Always wear gloves and protective eyewear when handling chemical spills to avoid secondary exposure. If the chemical is volatile, ensure the area is well-ventilated before you begin the cleanup process.
“Preparation is the greatest tool a pet owner can possess when facing an unexpected medical crisis.”
Effective management of these injuries relies on quick, decisive action. Use the following table to understand the immediate steps for different types of exposure.
| Injury Type | Primary Action | Duration | Safety Note |
|---|---|---|---|
| Thermal Burn | Cool Water | 5+ Minutes | Avoid Ice |
| Dry Chemical | Brush Off | Immediate | Wear Gloves |
| Liquid Chemical | Flush Water | 15-20 Minutes | Ventilate Area |
By keeping these canine first aid tips in mind, you can act with confidence. Always prioritize your safety while providing the necessary care to stabilize your pet before reaching the clinic.
Managing Seizures and Neurological Emergencies
Witnessing your dog experience a sudden seizure can be a frightening event for any pet owner. While these episodes are often distressing, your ability to remain composed is the most effective way to assist your companion. Proper common dog injuries handling during a neurological crisis ensures that your pet stays protected until the episode passes.
Keeping the Dog Safe During a Seizure
The primary goal during a seizure is to prevent your dog from accidentally hurting themselves. You should immediately clear the surrounding area of any furniture, sharp objects, or hard edges that could cause harm. If your dog is on an elevated surface like a bed or sofa, gently guide them to the floor to prevent a dangerous fall.
It is crucial to remember that you must never place your hands or any objects near your dog’s mouth. Even the most gentle dog may bite involuntarily during a seizure, which is a significant risk in common dog injuries handling. Keep your hands away from their head and focus on keeping their body cushioned with a soft blanket or pillow.
Timing and Recording the Episode
Once your dog is in a safe position, your next step is to observe and document the event. Note the exact time the seizure begins and how long it lasts. If possible, use your smartphone to record a short video of the episode, as this provides your veterinarian with invaluable diagnostic information.
Try to observe the nature of the movements, such as whether the shaking is localized to one limb or involves the entire body. Keeping a detailed log of these events helps your vet determine the underlying cause and develop a long-term management plan. Accurate documentation is a vital part of common dog injuries handling that significantly improves the quality of care your pet receives.
Providing CPR and Artificial Respiration
Mastering basic resuscitation techniques is a core component of effective dog emergency care. While these procedures are considered a last-resort measure, they can sustain your pet’s life during a cardiac or respiratory arrest. Learning these pet first aid steps provides you with the confidence to act when every second counts.

Locating the Pulse and Heartbeat
Before starting any intervention, you must determine if your dog has a heartbeat. Place your hand on the left side of the chest, just behind the elbow, to feel for a pulse. If you cannot find a heartbeat there, check the femoral artery located on the inside of the hind leg near the groin.
Chest Compression Techniques
If you confirm that your dog has no pulse, you must begin chest compressions immediately. Place your hands over the widest part of the ribcage for medium to large dogs. For smaller breeds, you may use one hand to wrap around the chest. Compress the chest firmly by about one-third to one-half of its width, allowing the chest to recoil fully between each push.
Rescue Breathing Procedures
If your dog is not breathing, you must provide artificial respiration as part of your dog emergency care routine. First, ensure the airway is clear by gently opening the mouth and removing any visible obstructions. Close the dog’s mouth tightly and breathe directly into the nostrils, watching for the chest to rise. These pet first aid steps should be performed in cycles until you reach the veterinary clinic for professional help.
Handling Eye and Ear Injuries
Injuries to the delicate structures of a dog’s eyes and ears can be frightening, but you can manage them effectively with the right approach. Because these areas are highly sensitive, they often cause significant pain and can lead to secondary infections if left untreated. Having the right dog first aid kit essentials on hand is the first step toward protecting your pet’s long-term vision and hearing.
Flushing Foreign Objects from Eyes
If you notice your dog squinting, pawing at their face, or experiencing excessive tearing, a foreign object may be trapped under the eyelid. You should never attempt to remove an object that is embedded directly into the eyeball. Instead, use a sterile saline wash to gently flush the area and remove loose debris.
Tilt your dog’s head slightly so the affected eye is lower, which helps the solution drain away from the other eye. Gently squeeze the saline bottle to create a steady stream, flushing from the inner corner outward. Always ensure your dog first aid kit essentials include a high-quality, preservative-free saline solution for these moments.
Managing Ear Hematomas and Lacerations
Ear injuries often present as either sudden swelling or active bleeding. A hematoma occurs when a blood vessel bursts within the ear flap, causing it to look thick, swollen, and fluid-filled. While you cannot treat a hematoma at home, you must keep your dog calm and prevent them from shaking their head until you reach a veterinarian.
For lacerations or cuts on the ear flap, bleeding can be surprisingly heavy due to the high number of blood vessels. Apply firm, consistent pressure using a clean gauze pad from your dog first aid kit essentials. If the bleeding does not stop after ten minutes of direct pressure, seek emergency care immediately.
| Injury Type | Primary Symptom | Immediate Action |
|---|---|---|
| Foreign Object in Eye | Squinting and tearing | Flush with sterile saline |
| Ear Hematoma | Swollen, puffy ear flap | Restrict movement and see vet |
| Ear Laceration | Active, bright red bleeding | Apply firm, direct pressure |
Managing Allergic Reactions and Insect Stings
When your dog encounters an insect or allergen, knowing how to react can save their life. While some reactions are minor, others can escalate into medical emergencies within minutes. Keeping your dog first aid kit essentials organized ensures you are ready to act if your pet suffers a sting or allergic flare-up.

Identifying Anaphylaxis
Anaphylaxis is a severe, life-threatening allergic reaction that requires immediate veterinary care. You should watch for signs like difficulty breathing, excessive drooling, or pale gums. If your dog collapses or experiences rapid facial swelling, do not wait for symptoms to subside.
While some owners keep diphenhydramine on hand, you must always confirm the correct dosage with your veterinarian before administration. Antihistamines are generally for mild reactions, not systemic anaphylaxis. A quick trip to the emergency clinic is the safest choice for any severe response.
Removing Stingers Safely
If you spot a stinger, your goal is to remove it without injecting more venom into the skin. Use a credit card or a dull knife edge to gently scrape the stinger out. Avoid using tweezers, as squeezing the base can release more toxins into your dog’s system.
Once the stinger is removed, apply a cold compress to reduce swelling and pain. Check your dog first aid kit essentials for clean gauze or a cold pack to soothe the area. Monitor your pet closely for the next hour to ensure no secondary symptoms develop.
| Reaction Type | Primary Symptoms | Action Required |
|---|---|---|
| Mild | Localized redness, itching | Cold compress, monitor |
| Moderate | Hives, facial swelling | Call vet, antihistamine |
| Severe | Collapse, breathing trouble | Emergency vet visit |
Transporting an Injured Dog Safely
Proper handling during transport is a critical part of emergency preparedness for pets. When your dog is injured, your primary goal is to get them to professional care without causing additional pain or trauma. Following correct pet first aid steps during this process can significantly improve their outcome.
Creating an Improvised Stretcher
If your dog cannot walk, you must move them using a flat surface to support their spine and limbs. A sturdy board, a piece of plywood, or even a thick blanket can serve as an effective improvised stretcher.
To use a blanket, lay it flat on the ground and gently roll your dog onto the center. If you have help, have one person on each side lift the edges of the blanket simultaneously to keep the dog level. Always keep the animal as flat as possible to avoid putting pressure on injured areas.
Securing the Dog in the Vehicle
Once you reach your vehicle, you must ensure the dog remains stable during the drive. Sudden stops or sharp turns can cause an injured pet to slide, which may worsen their condition.
If possible, place the stretcher on the floor of the vehicle or secure it on a seat with a harness or seatbelt. Keeping your pet warm with a light towel or blanket is also essential, as shock often causes a drop in body temperature. Remember that emergency preparedness for pets is about staying calm and focused on these vital pet first aid steps until you arrive at the clinic.
Conclusion
Your dog relies on your quick thinking and calm demeanor when accidents occur. Mastering basic first aid for dogs transforms you from a worried bystander into a capable advocate for your pet.
Commitment to emergency preparedness for pets creates a safer home environment for every member of your family. Small steps like keeping a stocked kit near your door or knowing the location of the nearest BluePearl Specialty and Emergency Pet Hospital make a massive difference.
Routine wellness visits with your veterinarian remain the best defense against long-term health issues. These checkups help you spot subtle changes in behavior or physical condition before they escalate into crises.
You now possess the knowledge to stabilize your pet during a medical emergency. Use these skills to provide comfort and safety until you reach professional medical help. Your proactive approach ensures your loyal friend receives the best possible care during their most vulnerable moments.